Create Project Automations
Updated
Project Automations let you build no-code rules that trigger actions in OnRamp, Salesforce, HubSpot, or external systems whenever something happens in a project. Define a trigger (like "when a task is completed") and an action (like "update a Salesforce field") to keep data synced without manual updates.
You can build automations directly on a Playbook or Project (covered here), or build them once centrally in the Automations Library (Library → Automations) and reuse them across many playbooks, projects, and modules. See the Automations Library article for the reusable approach.
Before You Begin
Connect your Salesforce or HubSpot integration under Settings › Integrations.
Confirm you have permission to edit the Playbook or Project.
Automations can be set at the Playbook level (applies to all future projects from that Playbook) or the Project level (one project only). To build an automation once and apply it to many destinations at once, use the Automations Library instead.
Step 1: Open the Automations Tab
Go to Library › Playbooks (or open a live Project).
Select the Automations tab.
Select + Create.
Step 2: Choose a Trigger
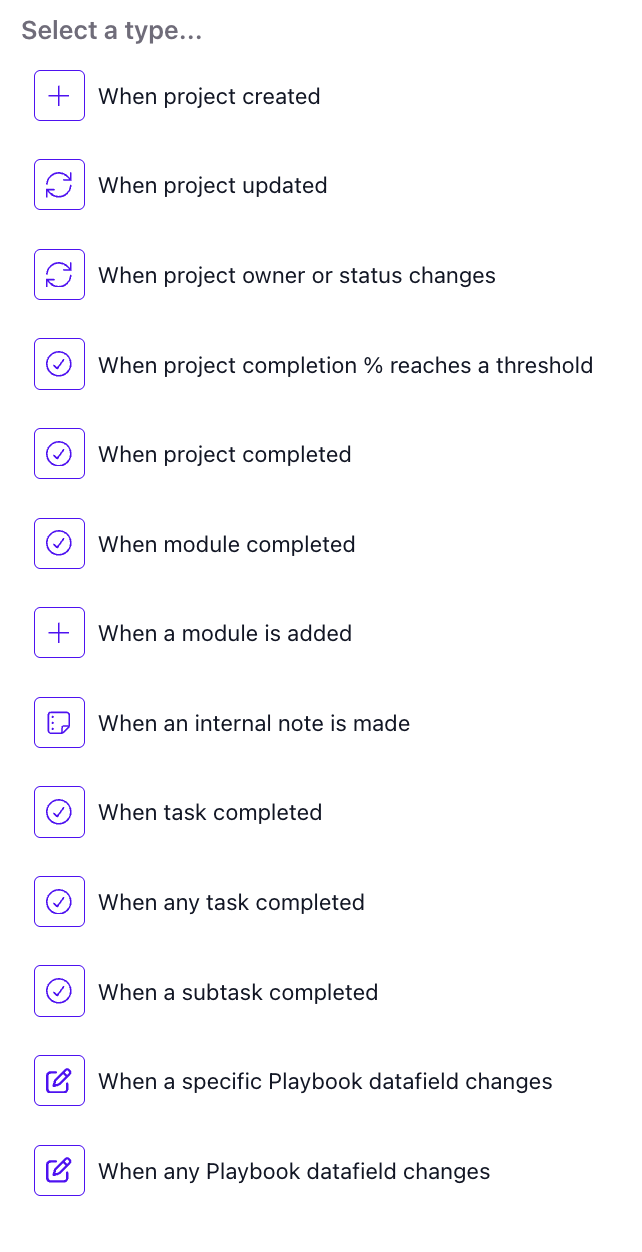
Triggers define when the automation runs. Available options:
When project created
When project updated
When project owner or status changes
When project completion % reaches a threshold
When project completed
When module completed
When a module is added
When an internal note is made
When task completed — you'll select the specific task
When any task completed
When a task is overdue — available when it's turned on for your organization. If you don't see it, contact your OnRamp team.
When a subtask completed
When a specific Playbook datafield changes
When any Playbook datafield changes
Notes:
To map subtask answers into Salesforce, use the When task completed or When a subtask completed trigger. Other triggers don't offer Task answers as a data source for field mapping.
At the Project level the trigger labels are worded differently: Project created, Project updated, Project owner or status changed, Project completion % reached, Project completed, Module completed, Module added, Internal note made, Task completed, Any task completed, Task overdue, Subtask completed, Specific Project datafield changed and Any Project datafield changed.
Step 3: Add an Action
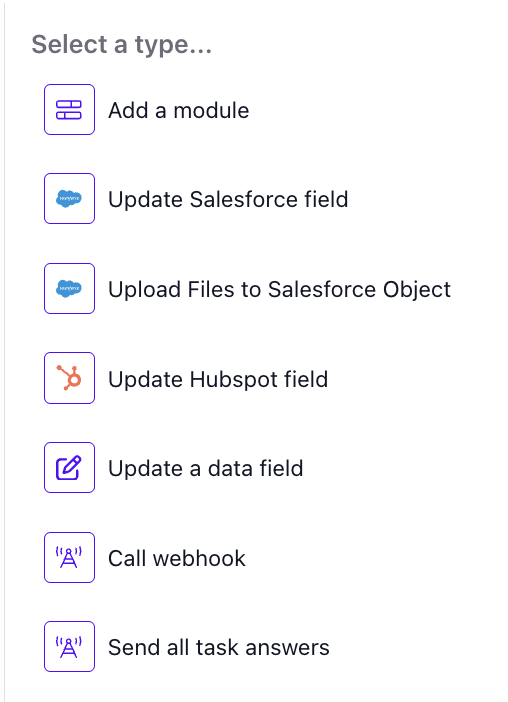
Select + Add Action and choose what happens after the trigger fires:
Update Salesforce field — sync OnRamp data into a Salesforce object
Upload Files to Salesforce Object — send task-uploaded files to Salesforce
Update Hubspot field — push field updates to HubSpot
Call webhook — send data to a webhook your organization has already set up, which you select from the Webhook list
Send all task answers — send the answers from every task in the project, not only the triggering task, to a webhook you select from the Webhook list
Update a data field — set the value of an OnRamp data field
Change task data — update data on a task in the project
Add a module — add a module to the project when the trigger fires (available when it's turned on for your organization)
Upload Files to Salesforce Object, Call webhook, Send all task answers and Add a module aren't offered when the trigger is When a task is overdue (Task overdue at the Project level).
You can chain multiple actions under the same trigger to update multiple systems at once.
Step 4: Configure the Action
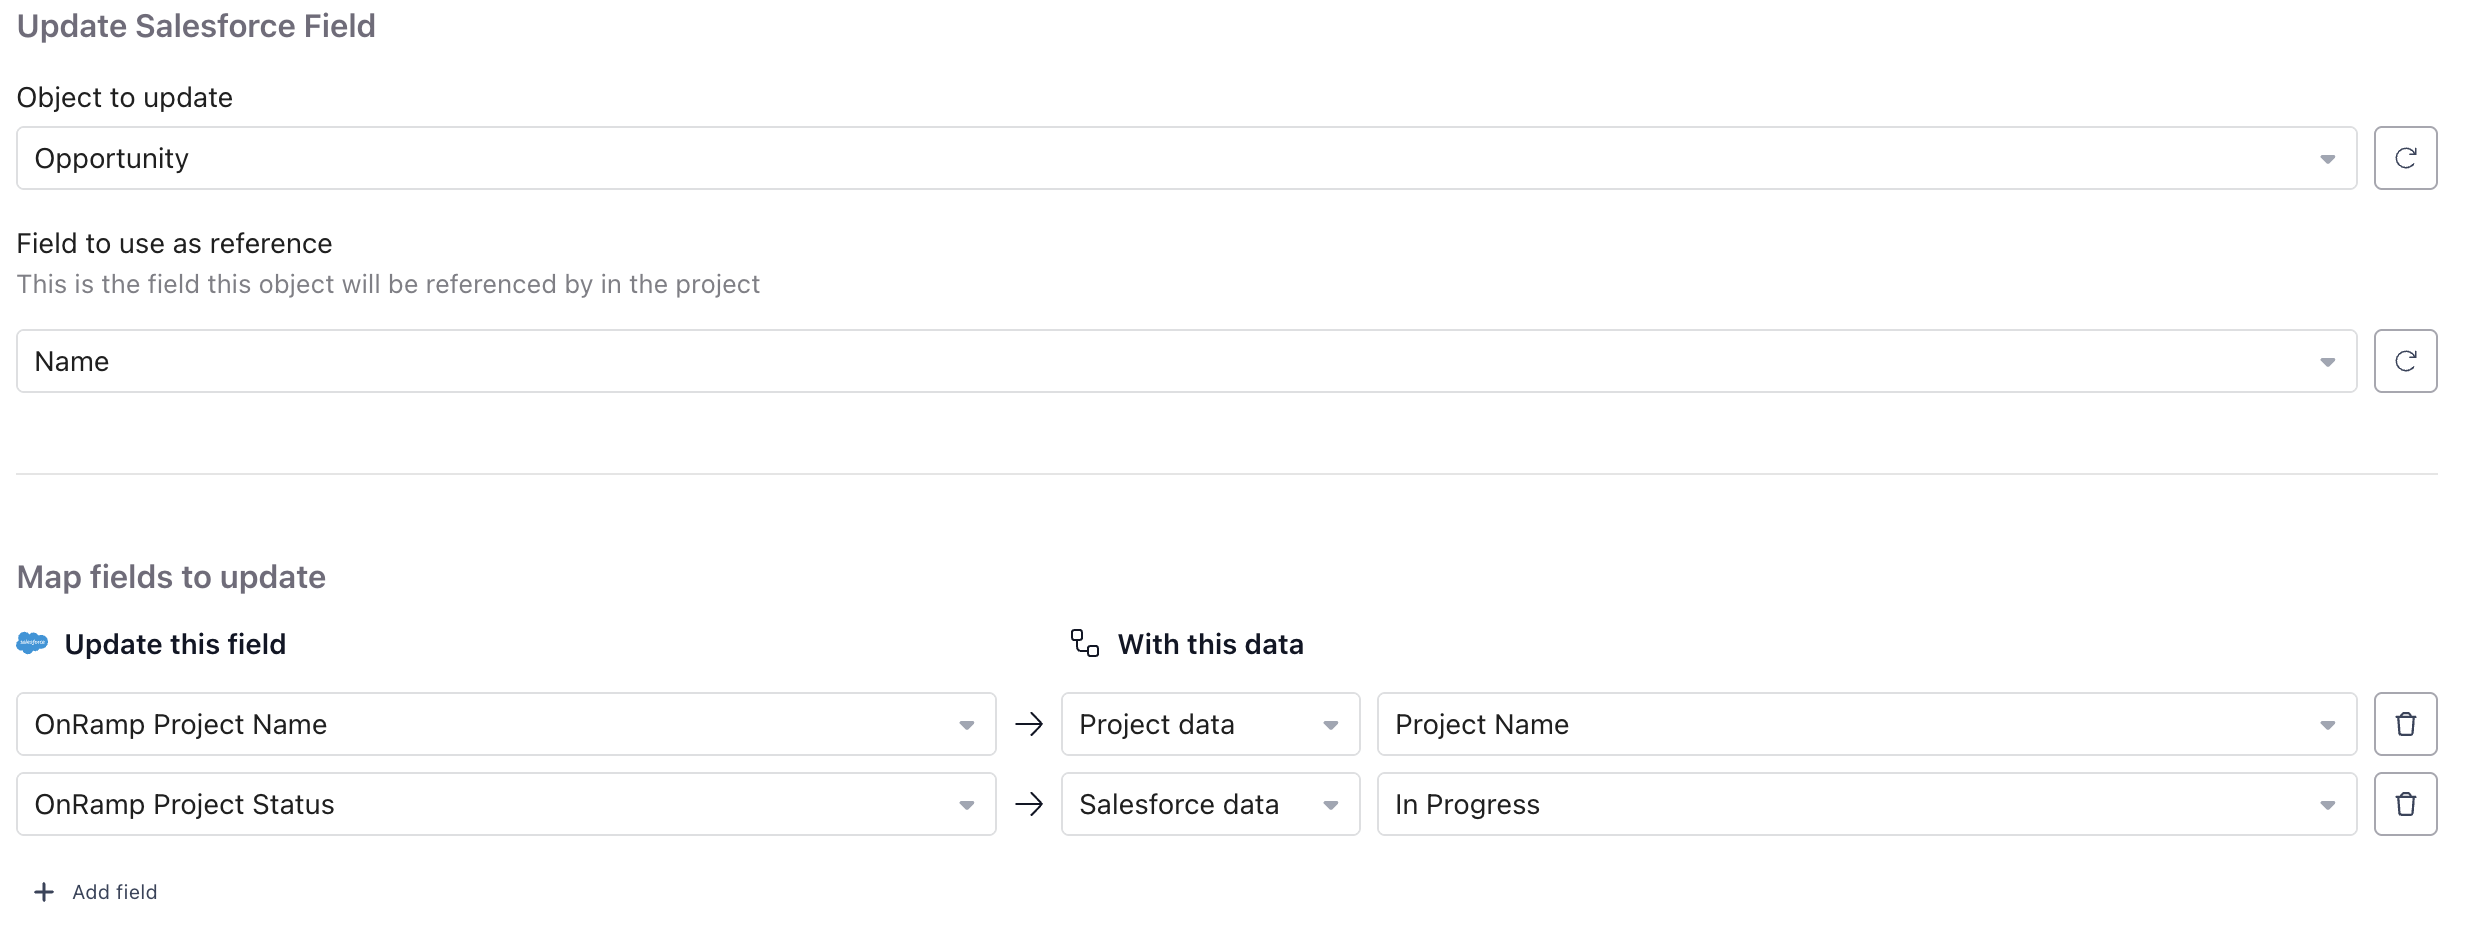
For Salesforce updates, you'll:
Select the Object to update (for example, Opportunity, Account, or a custom object).
Choose a reference field to identify the correct record (commonly Name or an ID field).
Under Map fields to update, match Salesforce fields with data from OnRamp — task data, project data, task answers, or Salesforce data values.
CRM field type support: All Salesforce and HubSpot CRM field types are now available in automations — including multi-picklist, email, phone, boolean, ID, and reference fields. Previously unavailable field types can now be used in both trigger conditions and action mappings. If a value doesn't exist as a dropdown option in your CRM, OnRamp will automatically create it.
Tip: The reference field must match a unique value from your OnRamp project, otherwise the automation won't know which Salesforce record to update.
Step 5: Save and Test
Select Save to store the automation.
Test by triggering the event in a sandbox or test project.
Use Edit or Delete Rule to adjust or remove it later.
Start simple — one trigger, one action — to confirm the integration works before adding more complexity.
Tips & Troubleshooting
Automation not firing? Check that the integration is connected under Settings › Integrations, that your trigger condition matches exactly (for example, correct task name), and that all mapped fields exist and are accessible in Salesforce or HubSpot.
Salesforce picklist options out of sync? Select the refresh icon next to the selected object in the automation to pull in the latest field and picklist values from Salesforce.
Playbook vs. Project automations: Playbook automations apply to every future project. Project automations are one-off — ideal for custom customer setups. To reuse the same automation across many playbooks or projects at once, build it in the Automations Library and apply or import it where needed.
Pro tip: Combine Automations with Workflows for a fully automated loop — Workflows create projects, Automations update your CRM as those projects progress.
Related
Automations Library — build an automation once and reuse it everywhere
Module Automations — automations that travel with a module